
How to Process Payments with Osmind


5
min read

September 1, 2022


Osmind Payments is the functionality that allows you to track, collect, and report on patient payments all integrated within your Osmind EHR workflows. You can:
- Create invoices & superbills
- Collect payments from multiple sources, including stored credit cards on file
- Collect prepayments and paying invoices with credits
- View a full history of payments and invoices for patients
This guide will show you how to get setup with everything you need to generate and keep track of cashflow, without interrupting patient care.
Creating an Invoice
You can generate invoices from the ‘Billing’ tab of a patient chart, or directly from clinical notes for any patient visit. First, you should confirm the information that will populate into the invoice, then you can generate invoices.
Here's what to do to check and modify the information that populates your invoice, step by step.
Settings:
Check your default information:
- Go to Settings from the top right logo dropdown
- Check your Locations details to include any Physical and/or Virtual locations
- If you are the Rendering Provider, check your Personal details to include your first and last name, as well as any credentials.
Create billing templates:
- Go to Billing Settings and choose Billing templates
- Click '+ Add billing template'
• Here you can customize what is included in the Invoice.
• You can change the name of the template by clicking on 'New billing template' in the top left and then saving your update with the green checkmark.
• Click '+ Add billing code' to include default codes for this template.
• You can choose a CPT or HCPCS code in the top box
• Number of units
• Base price
• Discounts
• Any Modifiers added will not populate on Invoices, only on Superbills for insurance reimbursement.
- Add as many billing codes as you'd like to this template!
Now your default information and templates are set-up. Next, here's how you create an invoice:
Create an Invoice
You can create an invoice by choosing to the ‘Billing’ tab within a Patient Chart and clicking the blue “New Invoice” button on the right-hand side of the screen
Billing Information
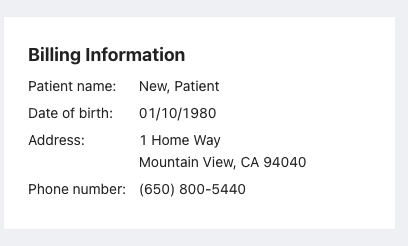
Appointment Information

- The Practice name will automatically populate from the Practice Details page in Settings
- The Appointment Date will only populate if a Clinical Note is linked to the Invoice in the “Notes” section—if no Note is linked, this field will stay empty.
- The Location, Rendering Provider, and POS sections are required in order to save an invoice. If any information is needed, you can click on the field and choose an option from the dropdown.
• If there are no options in the dropdown, add the information under Settings.
Procedures
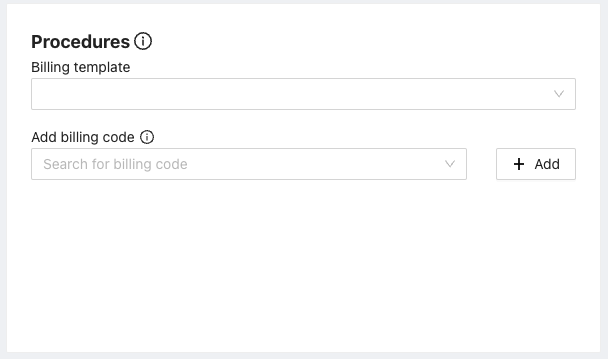
In the Procedures section, you can add any relevant billing codes to the invoice, or choose a preset Billing Template created in the Billing Settings page. You can add as many additional codes as needed or delete a default auto-populated code. You can also input any units, charges, and discounts for each billing code.
Notes
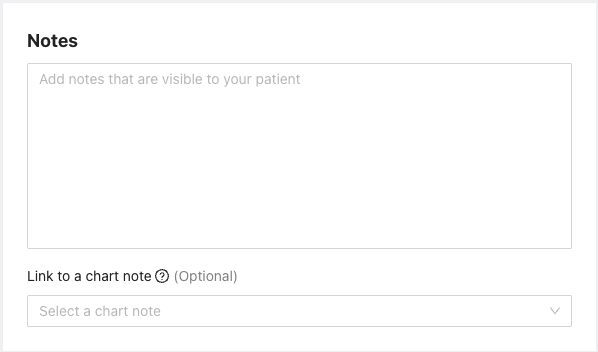
- You can add any relevant Clinical notes to an invoice that are visible to your patient on the saved invoice
- Providers will have the option to link an invoice to any Clinical Note, which is displayed in the ‘Billing’ tab of the Patient Chart
Completion
Here are your options for completing the invoice:
‘Discard’
- Discarding the Invoice will close you out of the drafting screen, and will remove all progress made on the Invoice
'Save Invoice’
Saving the Invoice will save a copy of the Invoice as-is and push the invoice to the list view in the ‘Billing’ section of the Patient Chart. Once an invoice is Saved, you will have the option to go back into the Invoice at any time and do the following:
- Pay Invoice
- Edit Invoice
- Export as PDF
- Create Superbill (note: this can only be done after an invoice is made)
- Delete Invoice
- Save Invoice and Pay
• This will automatically save the Invoice to the list view in the ‘Billing’ section and go directly to the “New Payment” screen.
Collecting Payments
You can track and collect payments from patients directly within their patient chart.
A Payment can be added in two locations:
1) Patient Chart → Billing → “New Payment” button
2) Directly from Invoice:
- “Save and Pay” (where)
- “Save” → “Pay Invoice”
Payment Method
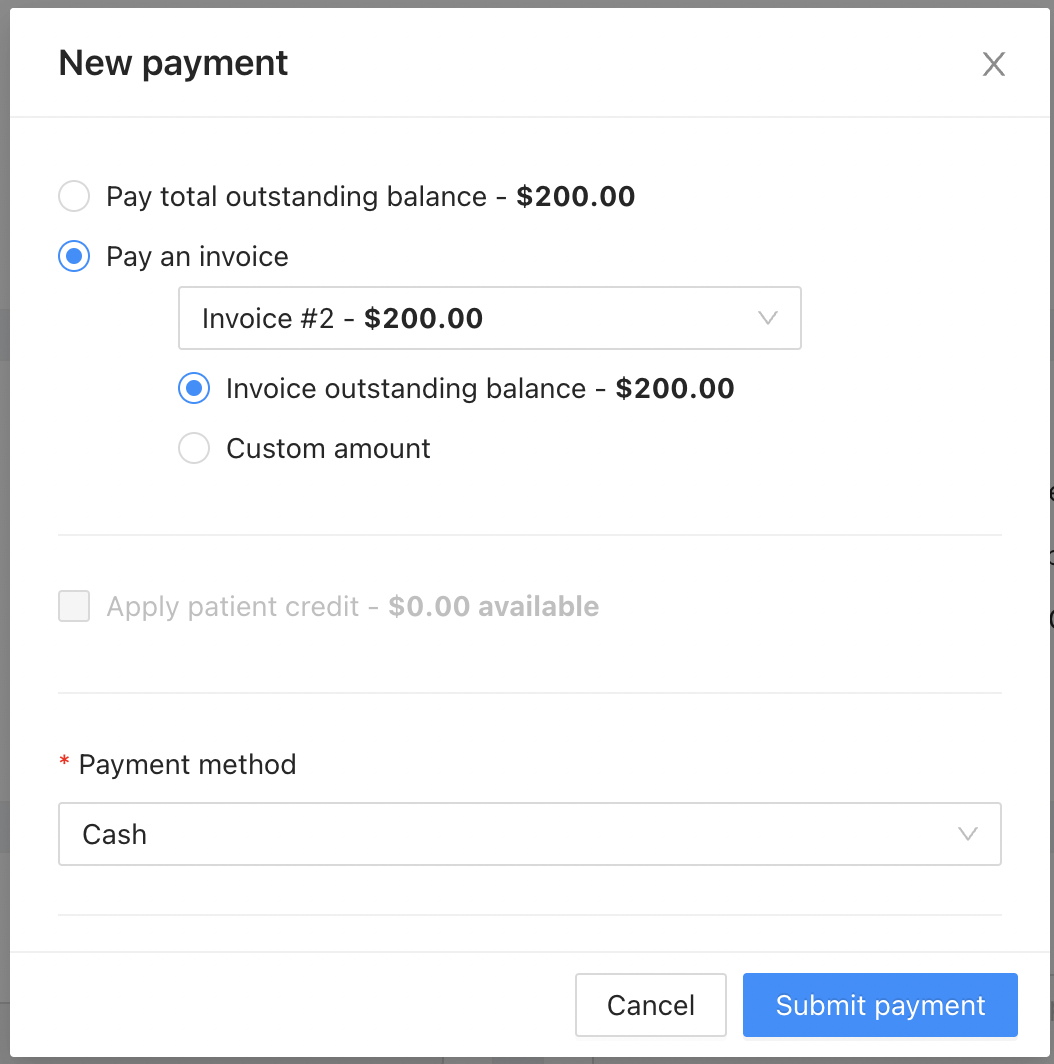
Pay total outstanding balance
- This will automatically calculate and display the total outstanding balance from all invoices in the patient chart.
Pay an invoice
- Choose a patient’s invoice from the dropdown list provided.
- Invoice outstanding balance.
•This will display the outstanding balance from the specific invoice chosen.
- Custom amount
•You can choose custom amount for partial payment on the specific Invoice chosen.
Payment Method
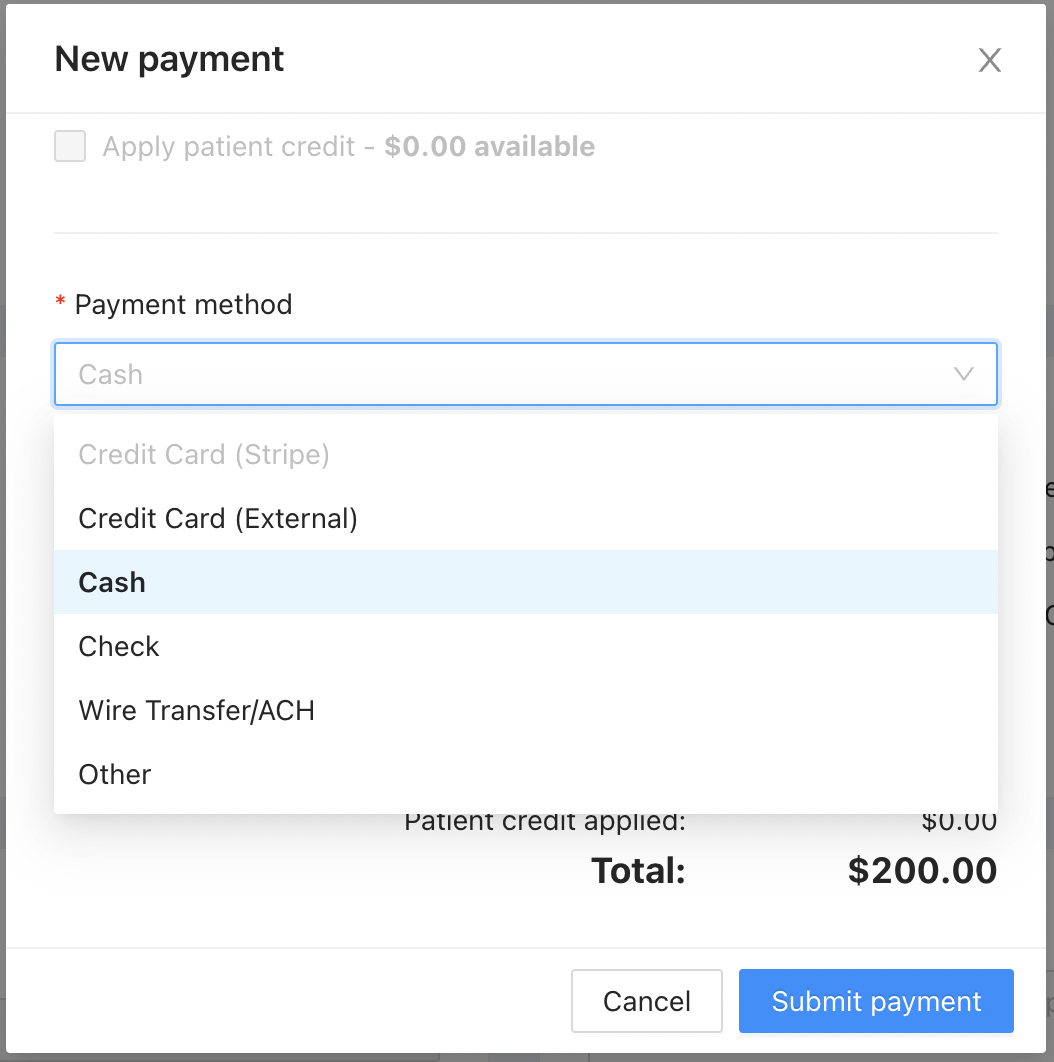
- Credit Card (Stripe)
•You can accept payments directly from Osmind
• You will be prompted to ‘Select a Card’, where you can choose from any saved cards on file, or “Add new card +”
- The below payment methods can be logged within Osmind in order to keep a ledger of the patient account:
• Credit Card (External) - this is for credit card payments collected outside of Osmind
• Cash
• Check
• Wire Transfer/ACH
• Other
- If a Memo is added in the Payment window, it will show up in the “Payments” tab of the ‘Billing’ section in the Patient Chart. Memos have a 20-character limit.
- Note: If there are no open (unpaid) Invoices available in the Patient Chart, new payments can only be made by applying credit to a patient account.
Once collected, you can view payment history in ledger form in the 'Billing' section of the patient chart in the bottom table.
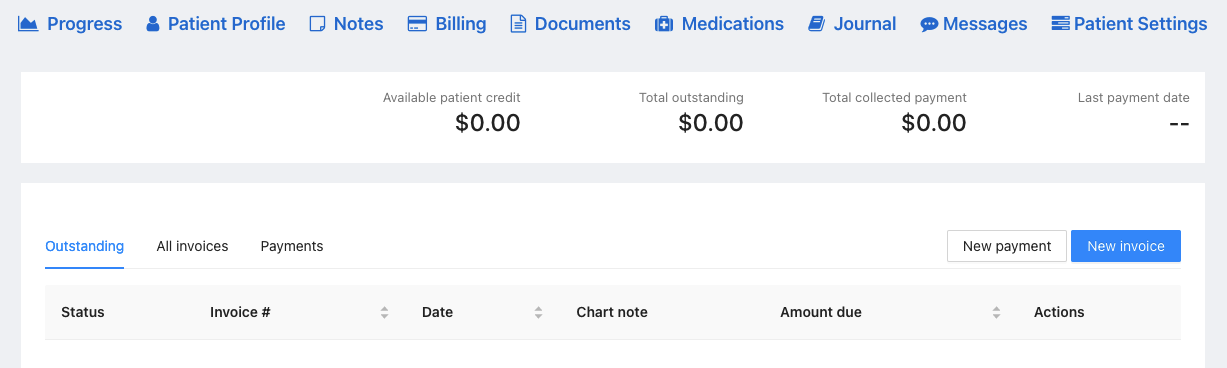
Using the Ledger
You can find a patient’s individual ledger within their patient chart, under the ‘Billing’ tab. This is where you can track the history of all invoices, payments, and refunds issued to that patient, all in one convenient place within the chart!
The ledger houses three sections:
1. Outstanding
2. All Invoices
3. Payments
1) Outstanding
The ‘Outstanding’ tab of the Ledger will only show invoices that are still awaiting full or partial payment. Once an invoice has been fully paid, it will automatically transfer out of the ‘Outstanding’ tab and can be found in the ‘All Invoices’ tab.
In this tab, you will see a table showing Invoice Status (unpaid, partially paid, or paid,) Number (chronological order for invoice creation), and Date (date created), as well as any linked Chart Notes and the Amount Due (unpaid balance of the invoice.)
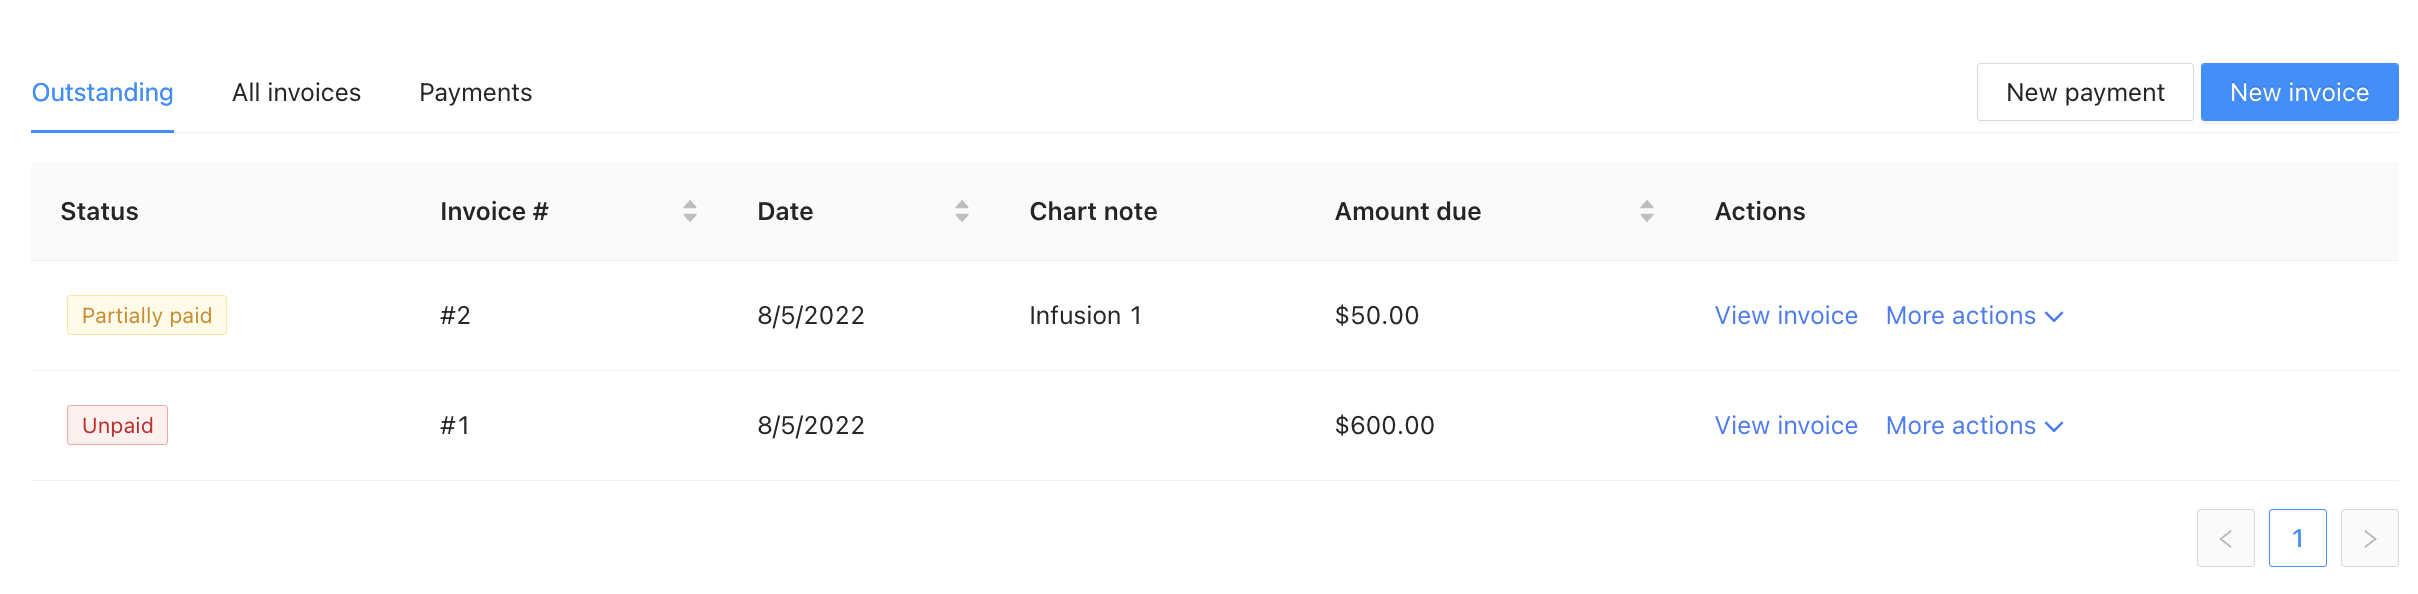
You are able to sort the Invoice #, Date, and Amount Due columns in ascending or descending order, and can view the invoice from this page (’View Invoice’) or choose any of the following options directly from the dropdown list ‘More actions’:
- New payment - add a payment to that specific invoice
- Export as PDF
- Create superbill - note: this can only be done once the invoice is made and can also be accessed directly from the linked chart note
- Delete invoice
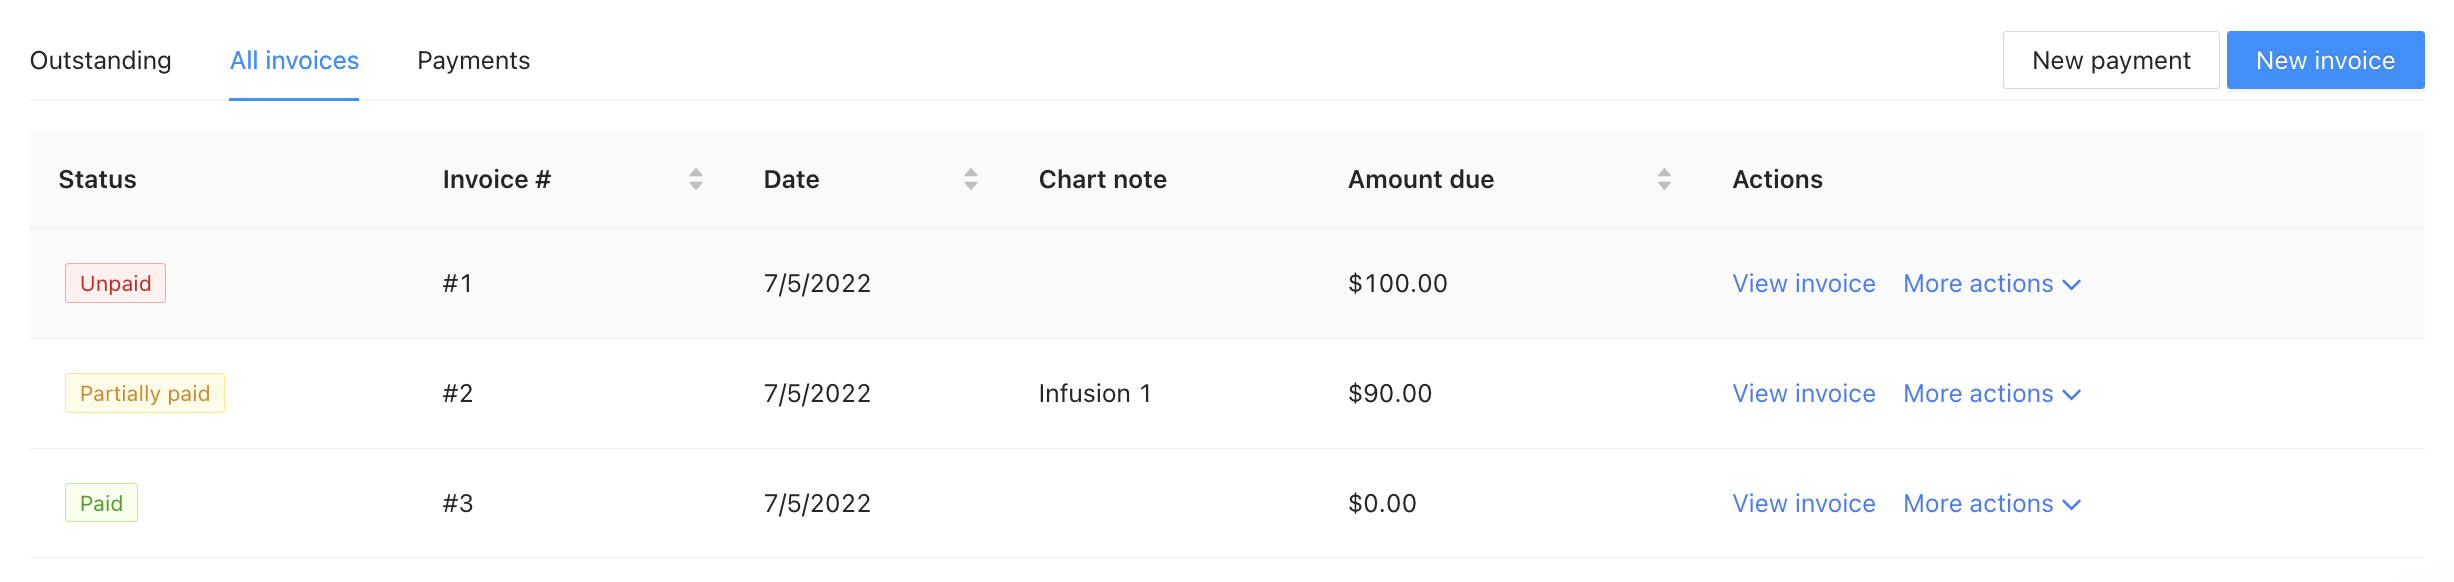
2) All Invoices
The ‘All Invoices’ tab of the ledger will show all available Invoices in the Patient account that have not been previously deleted.
In this tab, you will see a table showing the same statuses as , have the same filtering options, and the same action choices from 'More actions' as you had in the Outstanding filter.
3) Payments
The ‘Payments’ tab of the Ledger will show all logged payments within the Patient Account. In this tab, you will see a table showing the Payment date and time, correlating Invoice #, Memos, Payment Amount, and any Available Credit left on the payment (if the specific payment made was Adding Credit to the account).
An Invoice # will only populate if the payment was applied to a specific invoice.
You are able to sort the Date, Payment Amount, and Available Credit columns in ascending or descending order, and can refund any payments from this table back to the patient if needed.
Now you have everything to create and manage invoices all within one Osmind's integrated EHR!

If you, or someone you know, is in crisis or needs immediate assistance, please call 911 immediately. To talk to someone now, please call the National Suicide Prevention Lifeline at 1-800-273-8255.
Osmind Inc. © 2024 All Rights Reserved.